 |
| Image of a scribe at work. Estoire del Saint Graal, La Queste del Saint Graal, Morte Artu. British Library, Royal 14 E III f. 6v Image originally found at http://www.larsdatter.com/scribaltools.htm |
I've mentioned on occasion that I prefer to work on inclined writing slope. It has a number of benefits such as improving my comfort, allowing for more consistent pen control, and keeping my work piece where I can see what I'm doing more easily. Working on a slope also for better control of the ink flow from some types of pens, allowing for cleaner, crisper lines.
Medieval manuscripts contain many images of scribes at work like the one above. In almost every one, the scribe is working on an angled writing desk. Given the effort and materials to build such a specific piece of furniture, they must have been necessary for the scribe's work. I believe there are two main reasons that a slope was important to medieval calligraphers, both of which are also relevant to modern calligraphers.
- Body Mechanics - Calligraphy is written best with whole-arm movements. It's much easier to get the correct movement and control it with your elbow hanging straight down in front of your shoulder. Working flat usually brings your elbow up against your body, forcing you to create letters by moving your wrist, resulting in a loss of control.
- Ink flow control - Feather quills and reed pens hold their ink through the physics of surface tension. If you try to use them on a flat surface, gravity overcomes much of that tension resulting in a lot of ink flowing onto the page. This makes crisp lines, especially hairlines, difficult or impossible to achieve. By working on an angled writing surface, gravity pulls less ink from the pen, resulting in crisper lines. This is also true of metal dip nibs, especially when used without a reservoir. It's less true of dip nibs used with a reservoir, cartridge pens, or felt pens.
As not everyone has the money or space for a large adjustable drafting table or a period style writing desk, here are some tips on how to create a writing slope for minimal cost.

- A drafting board.*
- Masking tape.
- A few sheets of thick, smooth paper.
- A method of cutting paper in a straight line, if your paper is larger than your drafting board.
- Optional - A pile of books, a towel and an extra pencil.
- Optional - A table top easel or easel box.
*Rather than spending a lot of money on a purpose-built drafting board, visit your local home improvement store and purchase a sheet of MDF (medium density fiberboard). Have them cut it into smaller pieces. A 2' by 4' sheet costs about $10. Cut the long dimension into thirds and you'll have three 24" by 16" boards. One of those can be cut in half to make two 12" by 16" boards.
The drafting board used in the pictures below is a 16" by 24" piece of MDF that cost less than $4.
Step 1 - Pick a location & position for your slope
Here are a few options for positioning your drafting board.
In your lap - This is the super low budget option: rest the bottom of the drafting board against your lap, and lean it against a table, desk, or even the wall. This method requires a fairly large drafting board to insure it is tall enough. It may take you some time to figure out how to make this stable and keep a consistent angle for the board.

Against a pile of books - It's hard to get a steep angle using this method. Make sure that the top half of the drafting board is resting against the books, or it will fall over.
 |
| Put the towel down so the halfway point will be just behind the pile of books (the left side of this image), and the edge is hanging off the table. Place the pile of books on top. |
 |
| Fold the towel over the books so both ends are hanging off the table. |
 |
| Place the pencil on top of the towel near the edge of the table. |
 |
| Fold the loose edges of the towel up over the pencil. |
 |
| Place the drafting board so the bottom edge catches the pencil inside the towel. This keeps it from sliding down toward you. The books are captured inside the towel so they can't slide away from you. |

Using an easel box - This is the method I use. It's more expensive, but also more stable and adjustable. The box is portable and can be setup on any table. Both the angle and height of the drafting board can be quickly adjusted.
 |
| Clamp the drafting board into the easel and adjust the angle. About 45° is period, but use what works for you. |
 |
| My easel box allows me to drop the bottom clamp arm below the surface of the table. I use this to catch the lip so it doesn't slide away from me while working. |
Find & mark your writing height
Get a pencil or pen and sit at your writing slope. Figure out at what height your hand and arm are most comfortable and give you the most control. For most people, this will be about level with your shoulder. Mark this on the edge of your board with pencil or a piece of tape.
Attach some padding paper
 |
| Padding paper attached. |
Using masking tape, attach two to three sheets of paper to the board. You want this paper to be almost as wide as the drafting board, but not quite. You want to tape it down without the tape folding over the edges. This will allow you to use a T-square against the left & right edges of the board.
The top of the paper should be a minimum of 6" above the mark you made for your writing height. This paper will provide padding behind what you are working on. This can help your nib bite into the surface of your work piece more easily. You may need to experiment to see if you prefer more or less padding.
Prepare and attach a guard sheet
Take another sheet of paper, and fold down the top few inches. Make sure the crease of the fold is sharp and straight. I used the handle of my scissors to sharpen the crease.
 |
| Back side of guard sheet, folded. |
Place the sheet on top of your board, with the short fold against the board. Keep the folded edge about 3/4" below where you marked your writing height. You want your fingers and hand to touch only the guard sheet when you work, not your finished piece. But you want enough room above it to draw your letters comfortably.
If you are right handed, the folded edge will be horizontal.
If you are left handed, it all depends on how you write. Hook writers and those using an oblique nib or nib holder from underneath might have the folded edge horizontal. Those who write from underneath with a straight or oblique nib might have it angled down to the right (higher on the left side than the right). Some left handed writers form their letters with the paper turned 90°, in which case the folded edge might be vertical, with the opening to the right. Experiment to see what works for you.
 |
| Guard sheet in place. You can just see the mark I made to line it up against on the edge of the board. |
Finally, tape down the guard sheet, keep it under as much tension from edge to edge as you can.
 |
| Guard sheet, taped down. |
Put it to use
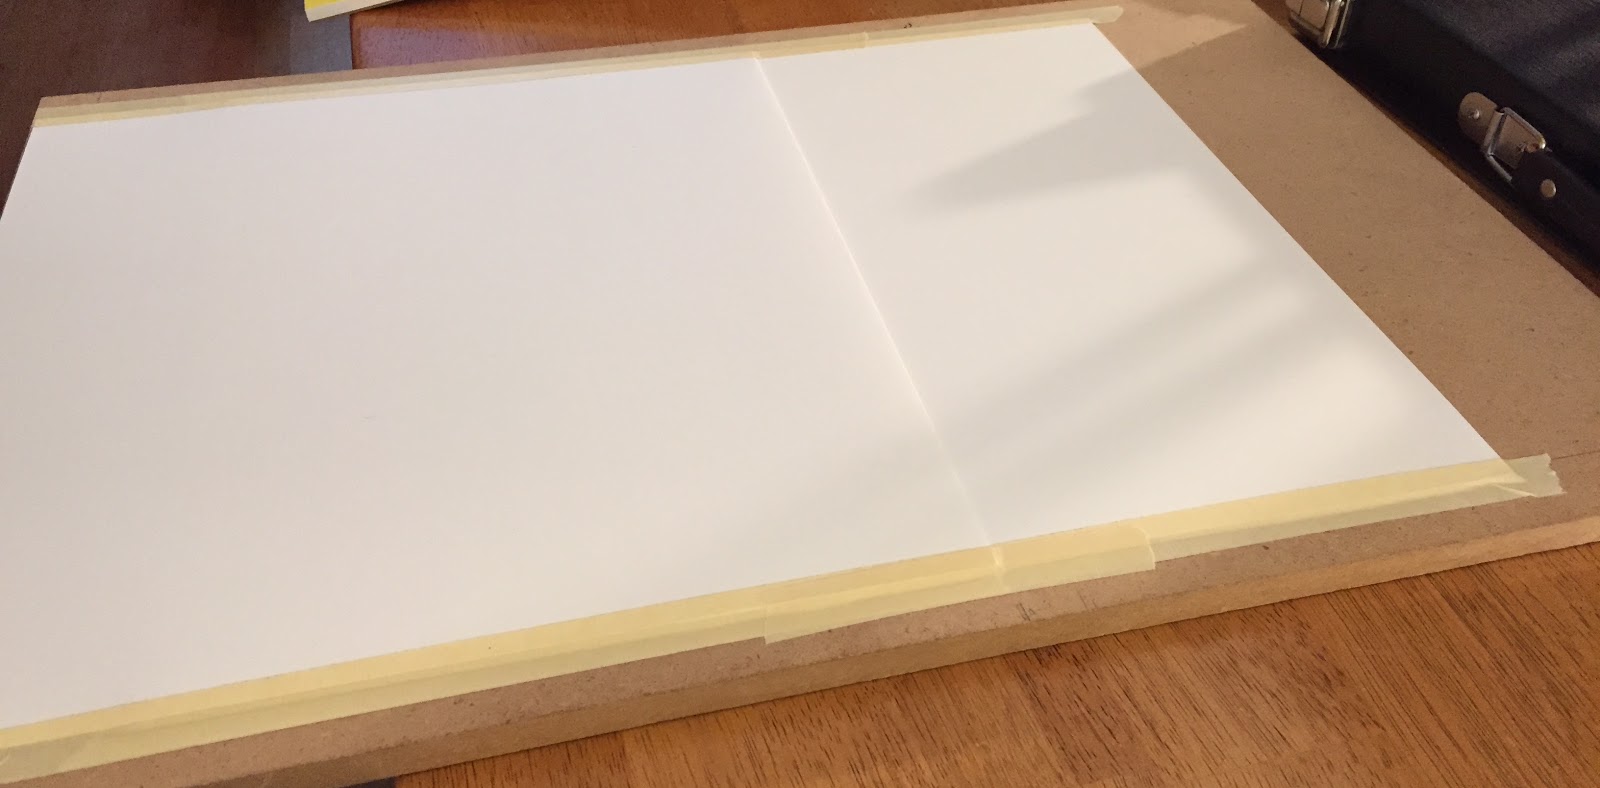
Place your writing slope back in position for use. Slide your work or practice paper between the guard sheet and padding sheets. The tension of the guard sheet should hold it in place.
 |
| My new clean writing slope, practice sheet in place. |
As you write, slide the work piece up as you complete each line. This keeps your hand and arm at the same height for every subsequent line, helping your consistency.
Finally, a few warnings and tips to keep in mind:
- Your pen should never touch the top fold of the guard sheet; that could cause ink to end up behind the guard sheet. Adjust the guard sheet down if its too high.
- Your hand should never touch the paper of the work piece. Adjust the guard sheet up if it is too low.
- Make sure the guard sheet has enough tension. You don't want your work piece sliding down behind it with wet ink.
- If you have any pouncing or erasing to do, take the work piece off your slope before doing so. The powder or eraser leavings can fall behind the guard sheet and cause problems.
This is so amazing and helpful! I am studying gothic script because i find the strictness and regularity soothing. I've been using a thick spiral bound book of painting paper [I draw the guidelines myself and it can be troublesome]. My wrists start hurting when i write for long periods, and the advice here about angling the book is very helpful! Thanks for sharing and keeping the articles up!Hope you are doing well, too!
ReplyDelete