
Since I recommend the "what, when, where, who, & how" approach for starting A&S documentation, I'll use it here to help summarize.
- What did I make? A leather belt pouch.
- What's it used for? Carrying stuff! For me, it's to carry my phone, money/checkbook, car keys, tokens, & business cards. Anything longer than a checkbook won't fit into the main pouch.
- When & where was it used in history? Western Europe, 14th to 16th centuries.
- Who would have had one in period? This style of pouch was only used by men. It shows up in lots of contemporary art and archaeological finds, so its use seems widespread. Due to the fittings and level of workmanship, this particular pouch would have been worn by someone who is fairly well off.
- What sources did I use? "Purses in Pieces" by Olaf Goubitz, & Gregor von Medehem's expertise and pattern.
- What was my process? Read on...
My first step was to ask Gregor for recommendations, and make a copy of his pattern pieces as he has made a few of these pouches. I modified the pattern a little: I changed the profile of the flap edges to match the curve of the fittings I purchased; I lengthened the belt loops and enlarged the opening between them a little to more easily accommodate a larger dagger being worn behind the pouch. I scanned the pattern pieces into a PDF for any who are interested in trying this on their own.
GET THE PDF PATTERN HERE! (Google Drive link)
Please note, the pattern doesn't include the buckled strap, the trim piece between the pouchlets, the decorative lacing that holds the flap to the back of the pouch, or the leather lacing for opening and closing the pouchlets.
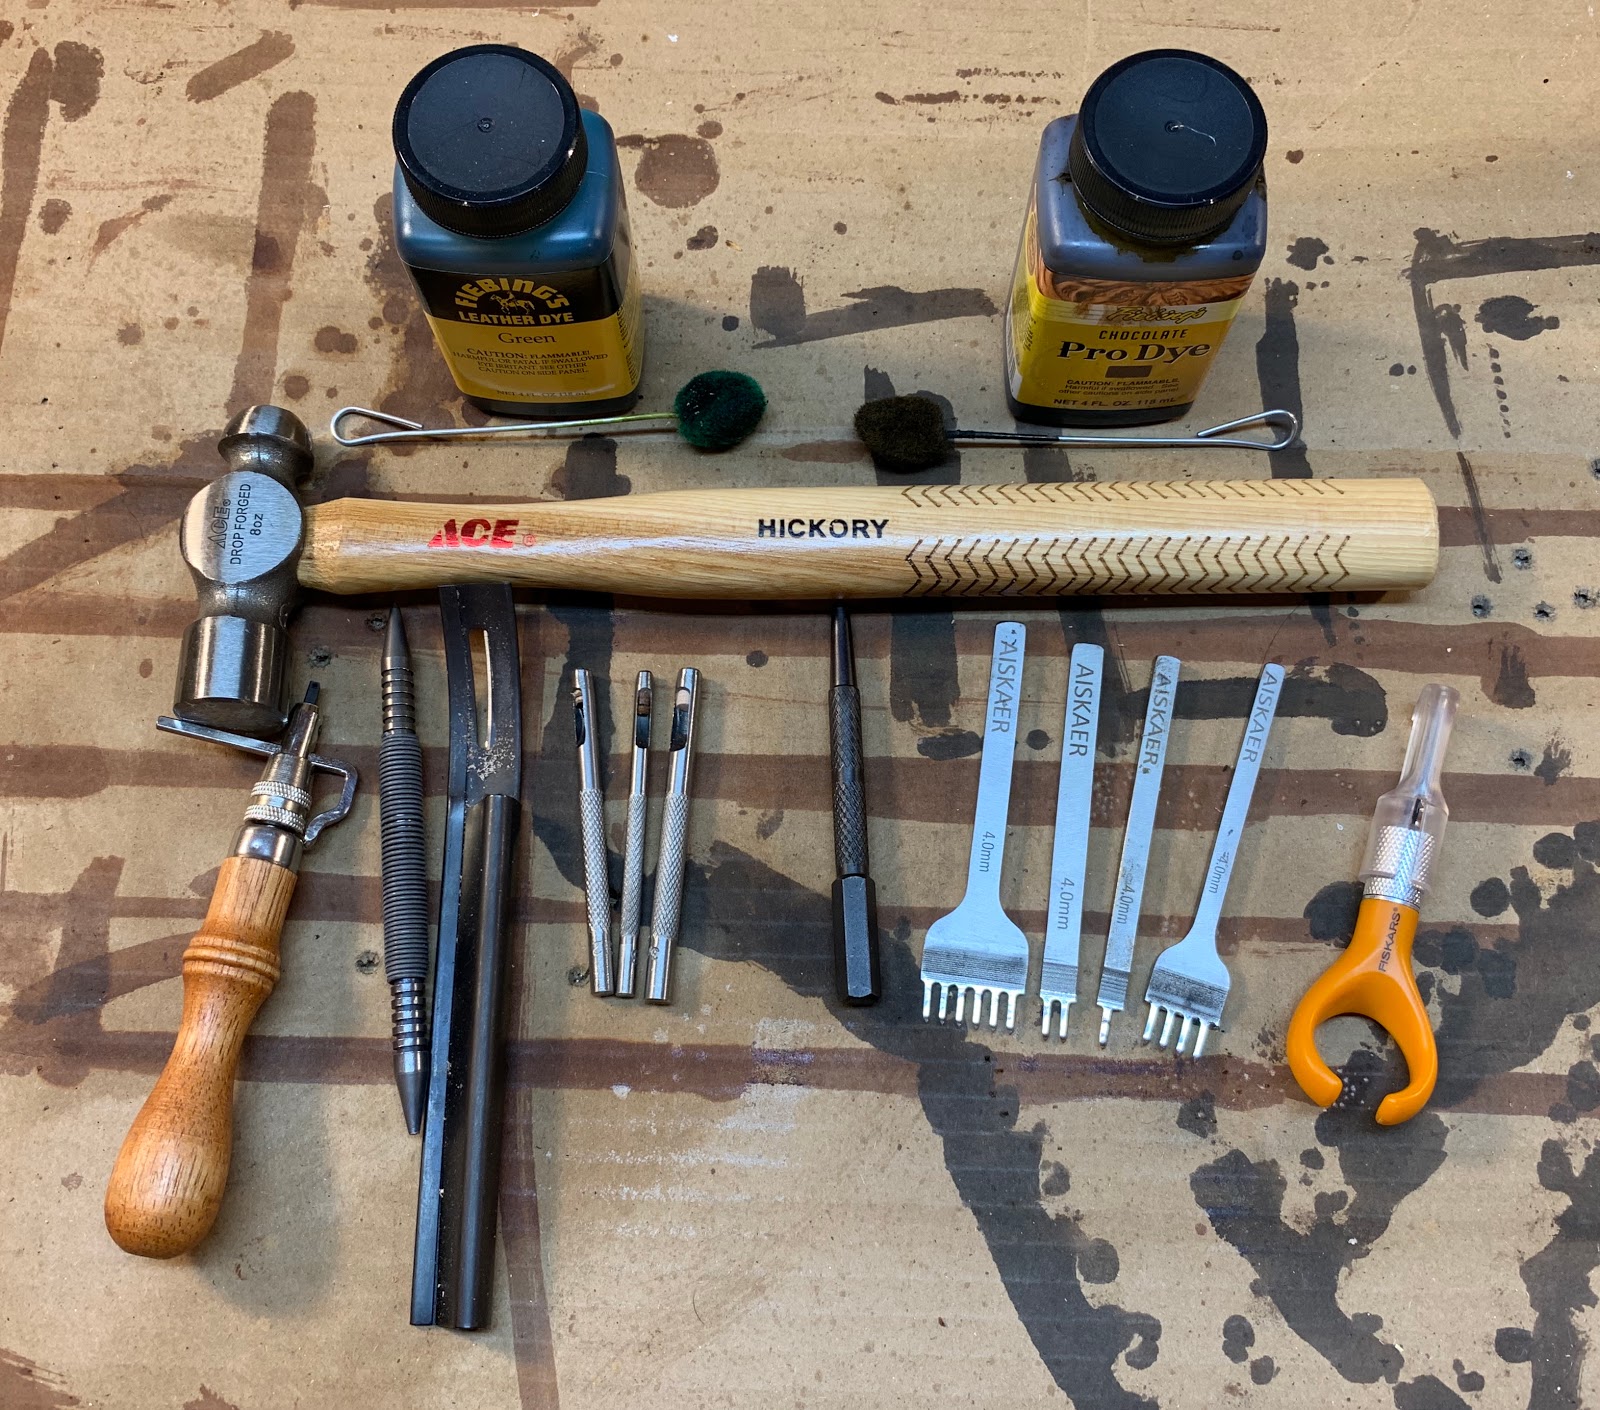 |
| Not pictured: Strap cutter, cutting board, leather finish. |
Tools & Materials
Leather: I used 4-5 ounce vegetable tanned leather for the large piece that makes up the back, belt loops and flap, as well as for the buckled strap and pouchlet cords. The front of the pouchlets, front of the main pouch, and reinforcement for the flap opening were all 1-2 ounce vegetable tanned.Dyes: Fiebings Pro Chocolate & Fiebings Green. I used a lot more dye than I expected to.
Finish: Fiebings Eco Flow Satin Shene
Tools: Skiving tool, adjustable groover, craft knife, lacing chisels, hole punches, drill press, nail set, hammer, cutting board, needles, waxed linen thread.

With my pattern finished, and leather acquired, I started cutting out the pieces. I used the groover to add a decorative groove inset from the edges of the front flap and belt loops.

As you'll see in the upcoming construction shots, part of the pouch is sewn together inside out, then soaked in water and inverted. To allow for this, the thicker leather around the edge of the back panel was skived (shaved) from almost 3mm thick to less than 1mm at the edge.

Because I wanted my pouchlets and pouch body to be different colors, I dyed them first. It took 4-5 applications of the dye to get the colors to where I was happy with them. And the dye fumes are pretty nasty, so make sure you plan for that. Also, wear gloves! The dye is very hard to get off of skin.
I did learn that it's safer to work with different leather dyes in different areas. Luckily nothing was ruined.

Once the pieces were dyed to my satisfaction, I "washed" them in water with a tiny bit of dish soap in an attempt to flush any of the excess dye out. Since I'd be wetting them after sewing them together, I didn't want the dark brown dye to stain the green pouchlets.
One thing I'd do differently in the future: Don't punch the lacing holes in the thin piece that makes the front of the main pouch before assembly! After sewing together and inverting the layers, these holes didn't quite line up with the holes on the outside piece. This resulted in a slight pulling of the leather over the main pouch opening. It's not bad, but I may stitch or glue it down to the back of the pouch in the future.
Assembly Time!

First I attached the center of the pouchlets to the front of the main pouch with a narrow trim piece. All of my stitching is done with blunt leather needles through holes that are punched with an awl or lacing chisel. I used waxed linen thread and a saddle stitch. Note how the trim piece extends above the top of the pouchlet piece to the edge of the opening of the main pouch.

Next I folded the thin reinforcing piece over the bottom of the main pouch opening and stitched it on. I made the bottom row of holes first and stitched them before making the upper row of holes. You can see it covers the raw end of the divider trim between the two pouchlets.

Next it was time to sew together all the parts of the pouch, inside out. I started stitching in the middle, and slowly worked my way out. There were three layers to line up and stitch through. The back (inside facing out), the pouchlets (facing the outside of the back) and the front of the main pouch (inside facing out, already partially attached to the pouchlets). I probably could have punched the holes for sewing in each piece ahead of time, but I wanted to make sure everything lined up well, so I held all three layers together, punched a few holes, sewed them, then repeated the process.

Halfway done, the view into the main pouch with everything inside out. The pouchlet piece is wider than the body so the pouchlets can open up and have depth, so you can see folds of leather on the side where it's sewn.

I stitched up the other side, and the pouch is largely assembled at this point.

Next stop: the sink!?
Vegetable tanned leather can be quite stiff. It becomes much more pliable when wet. To make it easier to turn the pouch right side out, I soaked it in water for a few minutes.

Then, while wet, I turned the main compartment inside out. It almost looks like a pouch now! Waiting for it to dry afterward was tough to do! After it was dry, I applied some leather conditioner, and after that had soaked in I applied the leather finish/sealer.

If you know me, you know I have a hard time resisting being a bit "extra" in my garb. So based on information from Purses in Pieces I added a decorative & reinforcing spiral stitch around the top edge of the pouchlet leather. I used Buttonhole twist silk from Burnley & Trowbridge.
You can also see in this image how the lacing holes in the piece that makes up the front of the main pouch are not lined up with the holes on the body piece. If there's a next time I'll be leaving them off until this point.

Before I could lace the front to the back, I needed to make the center strap. I decided to make a buckle plate and strap end out of brass sheet, so I had to switch from leatherworking to metal working for a little bit.

This also meant a little practice on scraps first. I mangled the first rivet. By the third, I had the technique good enough to use.

I cut the straps, dyed and finished them, and attached the strap ends and buckle.

Next, I punched the holes needed for the pouchlet lacing. There are 10 holes in the pouchlet edge, and four holes through the front of the main pouch. Pulling on the metal end of the lacing opens the pouchlet, pulling on the two loose ends closes it.

Time for practice with the lacing. This is a single piece of leather that is threaded through itself. The cuts are made as the lacing is being done.

I dyed the lacing green to match the pouchlets before I started for real.

All laced together! Note that the buckled strap is laced in place. It has two holes punched in it to allow for this.

The final step was to add the fleur-de-lys fittings to the front flap. These were sourced from peraperis.com and based on some early to mid-15th century art. I drilled three holes for the posts and hammered the caps on the back into place.

Flap open to access the main pouch, pouchlets closed.

One pouchlet open.
Conclusion


The shape and construction are much more typical of period pouches. The quality of my work has improved as well.

Here it is being worn for the first time at a lovely event in the Shire of Hadchester. The knife and pricker are from Todcutler.com and will be replaced with a ballock dagger set I have commissioned that should be done shortly.
What would I do differently?
- Wait to punch the lacing holes into the front piece for the main pouch.
- Make the front flap about 1 cm longer. It just barely covers the top edges of the pouchlets when closed and with objects in the pouchlets. It looks great as is, and it's kind of nice to be able to see some of the silk stitching, but it means the pouchlets are unprotected from thieves!
- Improve the appearance of my strapends. They are a little clunky as is.
- Maybe simplify a little. As much as I love this pouch and the metal fittings, based on the evidence currently available to me, it's only period to someone from maybe 1430 or later. If I removed the fittings all together, or went with a number of metal studs on the flap, it would be a better choice for a 1415 kit.
very nice work...
ReplyDeletethanks for posting the patter, and all the progress pics
ReplyDelete